Commercial stands are fine, but for a lot of shooters a homemade target stand is fun project to work on away from the range, plus one that can save you money.
Recently, I updated my flashlight review protocols. One of the things I wanted to include were photos of the flashlights’ beam at night. For scale, I decided to illuminate a target at a known distance. For that, I needed a target stand. Rather than buy a commercial product, I decided to build my own portable target stand.
There are a lot of DIY hobbyists in the gun world. I’m one of them, and since you are reading this, I’m betting you are as well.
I documented my building effort and put together my notes into these plans for you to use if you like.
My total cost for parts was $34.40. Anyone with some of the parts lying around can do this even cheaper. My total time for construction was about two hours. You will likely do it in half the time because you won’t be stopping along the way to photograph and document your work.
- Preparation
- Assembly of the Stand
- Step 1 – Cut PVC Pipe to 16" Lengths
- Step 2 – Seal Four Ends with Test Caps
- Step 3 – Assemble Rear Base Legs
- Step 4 – Assemble Front Base Section
- Step 5 – Complete Assembly of Base
- Step 6 – Cement Uprights to Tees
- Step 7 – Assemble Upright Section
- Step 8 – Complete Assembly of Target Stand
- Step 9 – Finishing and Use
- Cheaper Assembly Option
- Final Thoughts
Preparation
As with any project, preparation can save you time later. I’ve put together a list of parts and tools you will need to build one of the stands I describe.
Parts List
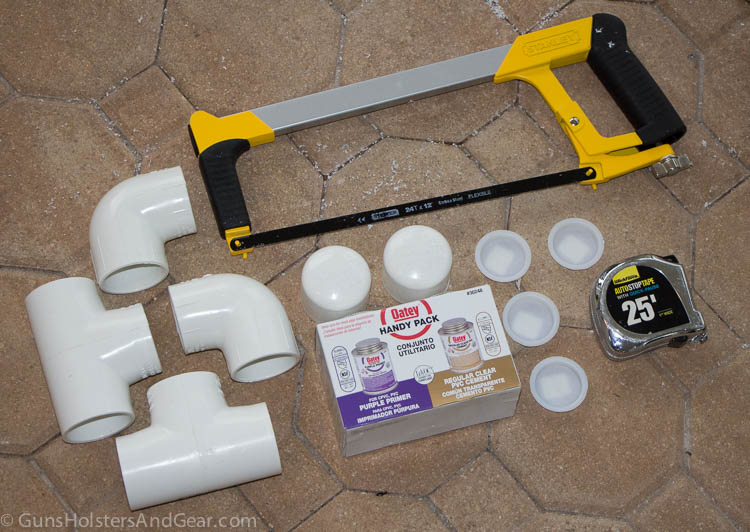
The following are the parts you will need to make the target stand I describe. To make things simple, I put together a PDF you can download to take with you to Home Depot, Lowes or wherever you do your shopping.
Here are the parts you need and the prices I paid for them locally at my Home Depot:
| Item | QTY | Price |
| 1.5: PVC pip, 10′ | 1 | $3.80 ea |
| 1.5″ PVC pipe. 2′ | 1 | $3.65 ea |
| 1.5″ PVC T-joint | 4 | $2.23 ea |
| 1.5″ PVC 90-degree elbow | 2 | $1.72 ea |
| 1.5″ PVC cap | 2 | $0.98 ea |
| 1.5″ PVC test cap | 4 | $0.58 ea |
| 1″x2″x8′ furring strips | 2 | $0.96 ea |
| PVC cement | 1 | $8.39 ea |
Click here to download the list to take with you to the store.
You will also need something to fill the PVC base with to weight it down. Dirt or sand out of your backyard will work, so don’t feel like you need to pick up self-leveling cement on your parts run.
Tools
Many people will have these tools on hand already. If you do not, don’t fret – they are relatively inexpensive. Here is what I used:
- measuring tape
- Sharpie marker
- hack saw (or specialized PVC pipe cutter)
- hand trowel/spade
General Cautions
Any time you use hand tools, chemicals or venture outside of your home, you run the risk of being injured. Exercise common sense and be careful. If you think anything I suggest is unsafe – don’t do it.
PVC cement and primer are chemicals that can be dangerous. Read the label and follow the instructions.
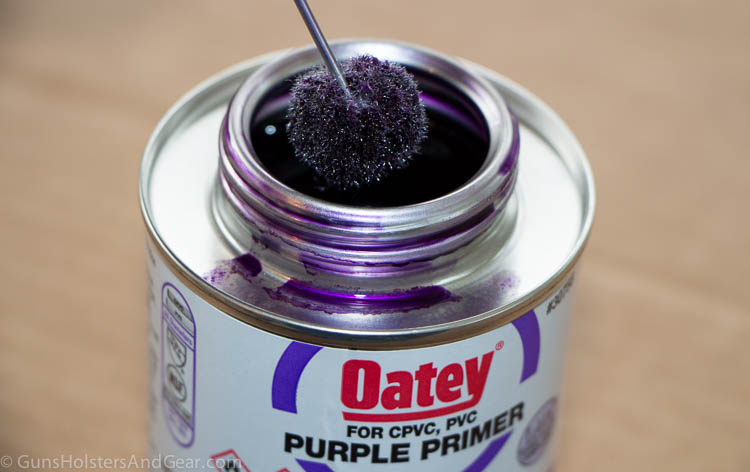
Another word of caution about PVC primer: it is purple and stains everything (including a pool deck – don’t ask me how I know.) Don’t work with this stuff over your carpet. I suggest taking things outside and working over old cardboard or something similar. Gloves aren’t a bad idea either.
Assembly of the Stand
I’ve arranged the steps in what I think are the easiest order. Some of you might see a better way. By all means modify these steps as appropriate and share your thoughts in the comments section at the end of this article.
Step 1 – Cut PVC Pipe to 16″ Lengths
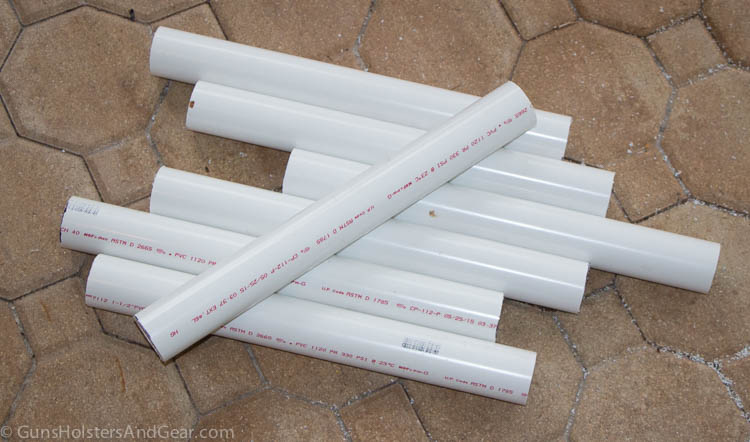
a. Using the measuring tape and Sharpie, mark off 16″ lengths on the 10′ and 2′ sections of PVC pipe.
b. Cut the pipe using the hacksaw or other tool. You should have eight 16″ sections of PVC pipe. Discard the scrap pieces.
Step 2 – Seal Four Ends with Test Caps
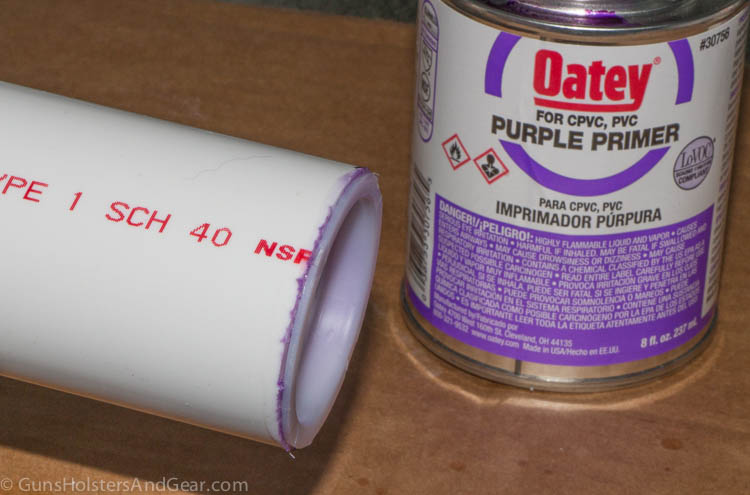
Take four of the PVC pipe sections and seal one end of each with the PVC cement and test caps. Follow the instructions of the PVC cement and be careful to not let it drip down your arm or onto anything valuable.
Step 3 – Assemble Rear Base Legs
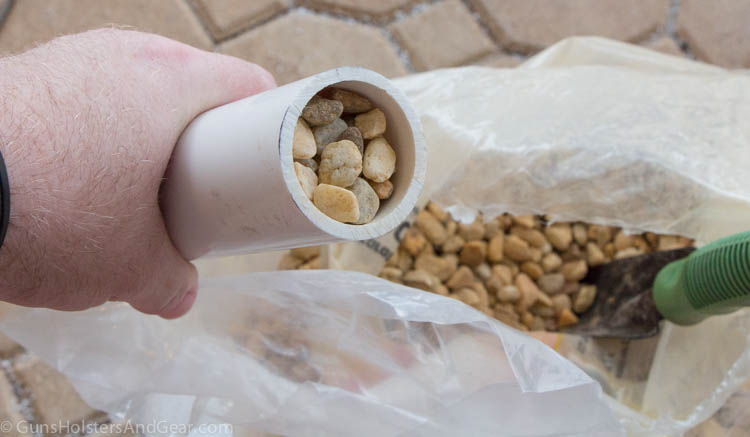
a. Take two of the sealed PVC pipe sections and fill the pipe with your ballast material. As mentioned above, this can be dirt, sand or virtually anything heavy. The pipe will be sealed, so don’t worry about the material leaking out.
For my target stand, I used pea gravel that I had on hand from another project. If that had not been on hand, I would have used wet sand from the back yard.
Make sure that the test caps are set before loading the ballast material in the pipe. You do not want them coming loose.
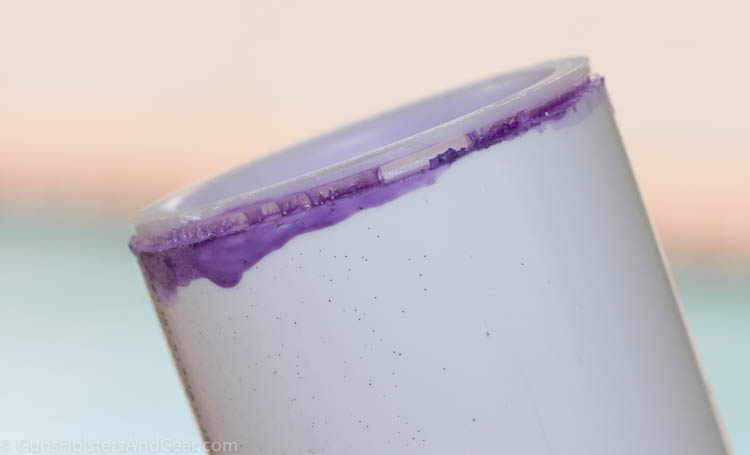
b. When the material is loaded in the pipe, seal the open end of each with the PVC caps and cement.
Step 4 – Assemble Front Base Section
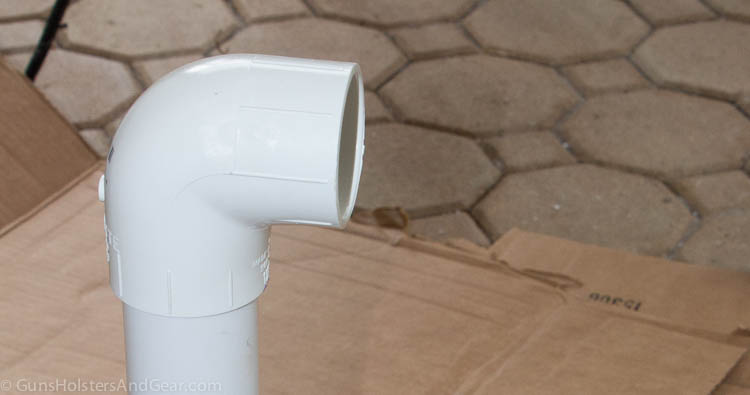
a. Take the other two PVC pipe sections with the test caps affixed and fill them with the ballast material. Then cement a 90-degree elbow to each of them.
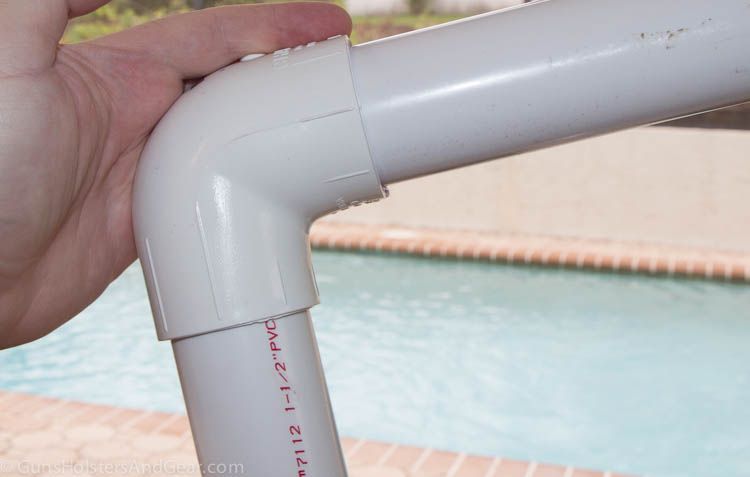
b. Take one of the unsealed PVC pipe sections and cement it into the open end of one of the elbows.
c. Fill the pipe with the ballast material.
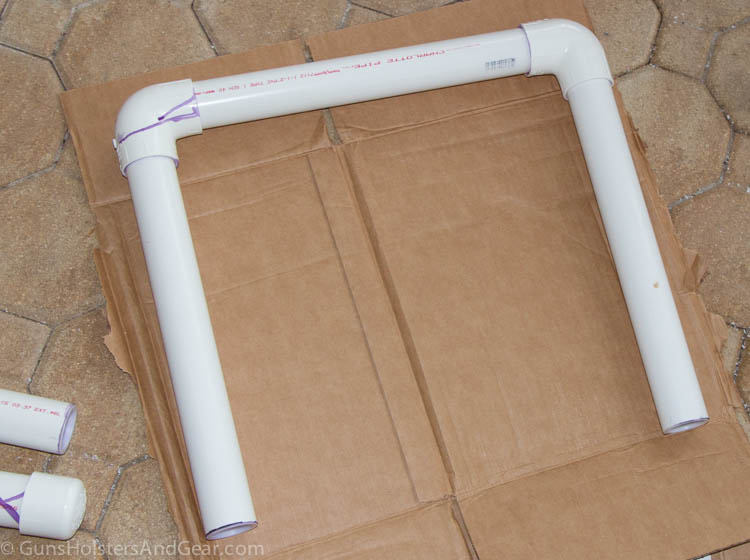
d. Cement the open end of this pipe to the open end of the remaining open elbow. This will complete the front part of the base section, and it should resemble three sides of a square.
Step 5 – Complete Assembly of Base
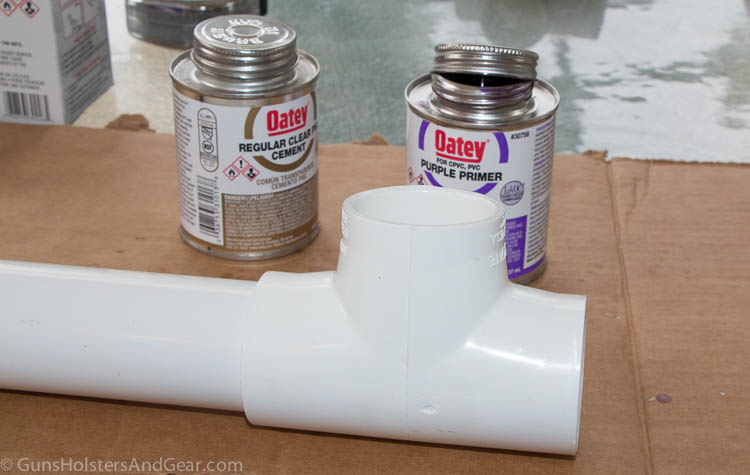
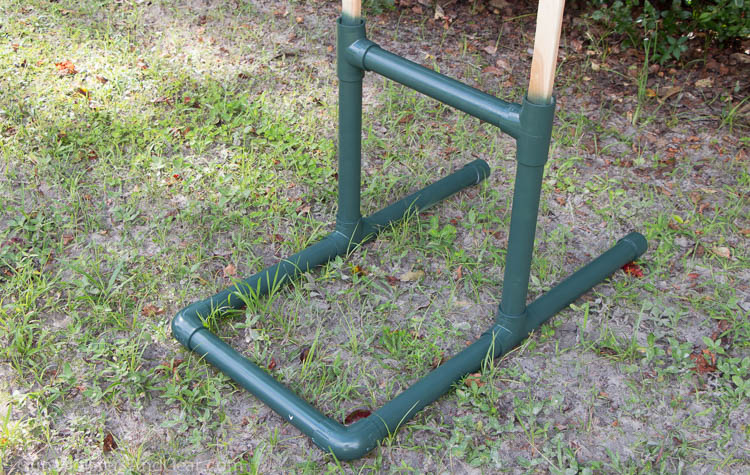
a. Cement one tee joint to each end of the front base section.
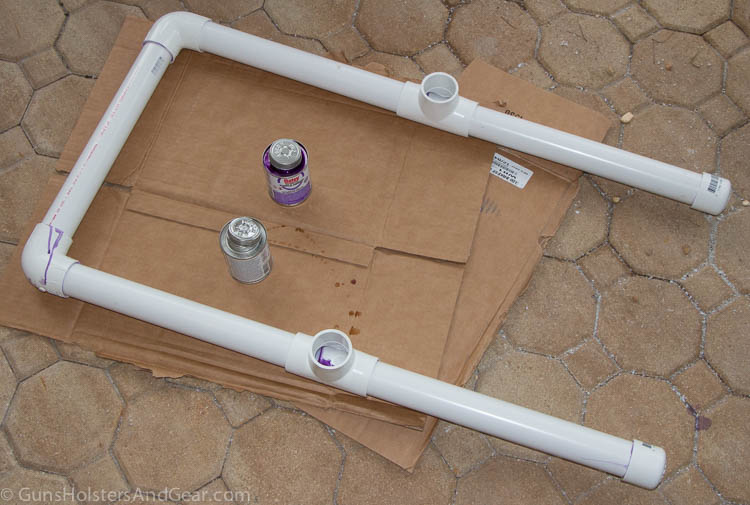
b. Cement the rear base legs into the open ports of the tee that are parallel with the front base section. This will complete the base section assembly.
Step 6 – Cement Uprights to Tees
Cement one of the unused PVC sections into one of the main outlets of an unused tee joint. Repeat for another PVC pipe section and the remaining tee.
Step 7 – Assemble Upright Section
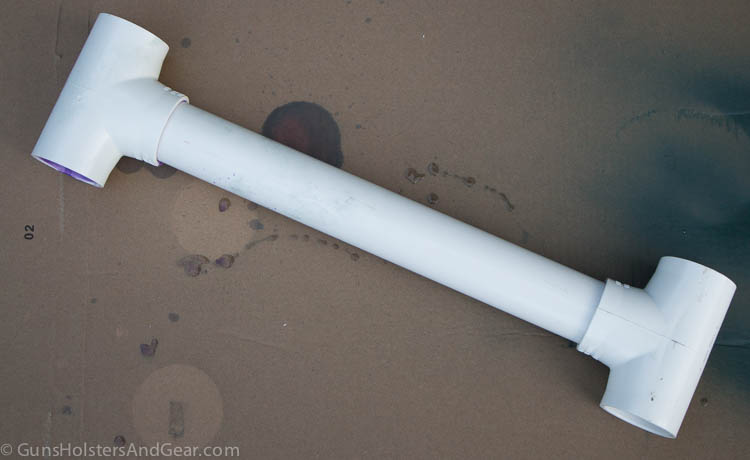
a. Cement the remaining PVC pipe section into one of the 90-degree outlets of the tee joints from Step 6.
b. Ensuring that all of the pipes will be on the same plane, cement the open end of the PVC pipe section in Step 7a to the remaining open 90-degree outlet from Step 6.
Step 8 – Complete Assembly of Target Stand
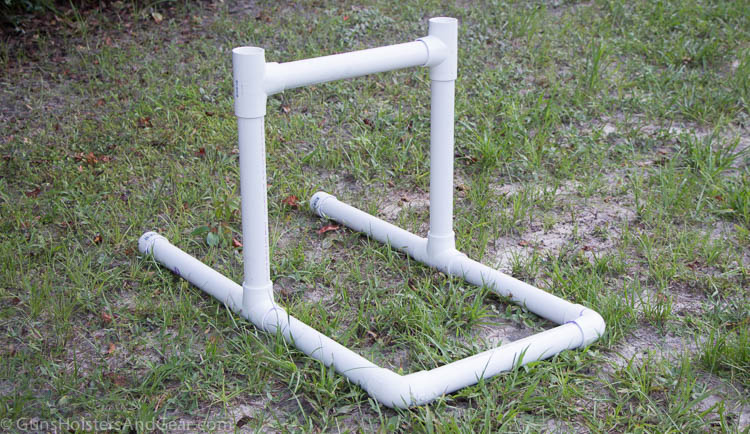
Slide the upright section from Step 7 into the base section. The target stand is now read for use.
If the stand is going to be used at a permanent location, the upright assembly can be cemented into the base. However, if this is going to be a portable target stand, do not cement the uprights into the base.
Without being cemented into the base, the uprights can be removed for more compact storage and transportation.
Step 9 – Finishing and Use
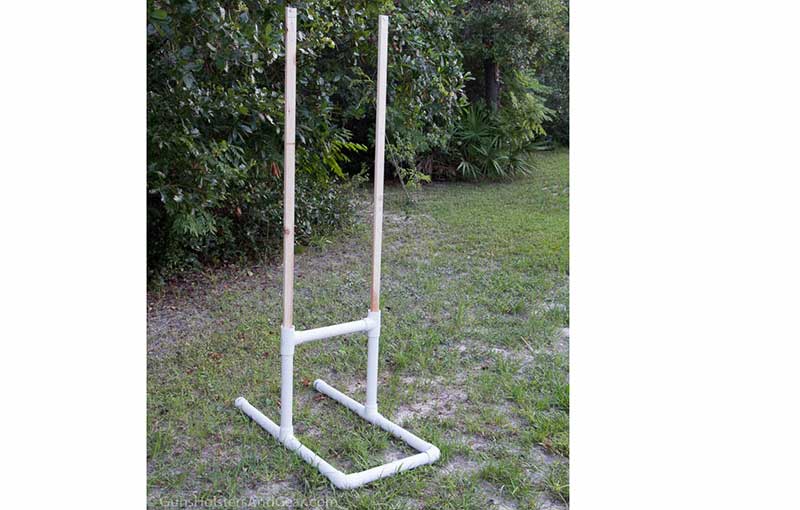
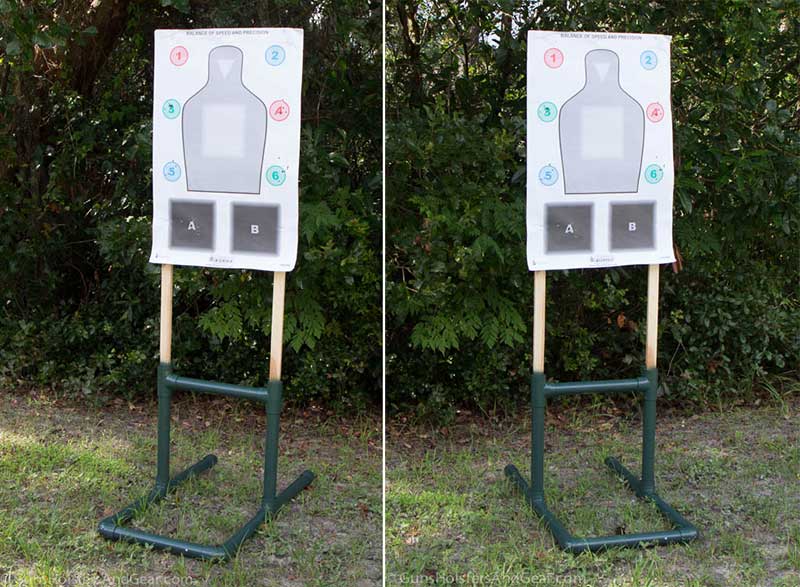
Insert the furring strips into the uprights. Targets and cardboard backers can be attached directly to these strips. If the strips are hit by a stray bullet, they are easy and cheap to replace.
The furring strips will be snug in the uprights. I find this helps to prevent them from swaying. You may want/need a rubber mallet to tap them into place.
I cut the furring strips to a 6′ length to approximate the average height of a man. You can cut them shorter or leave them long to meet your needs.
White PVC doesn’t bother me, but applying spray paint is an option. You definitely want to use a spray paint that is specifically designed for plastics, otherwise you can expect a lot of chipping in short order. Sanding and stripping off the pipe printing is a good idea (a great guide on this is here.)
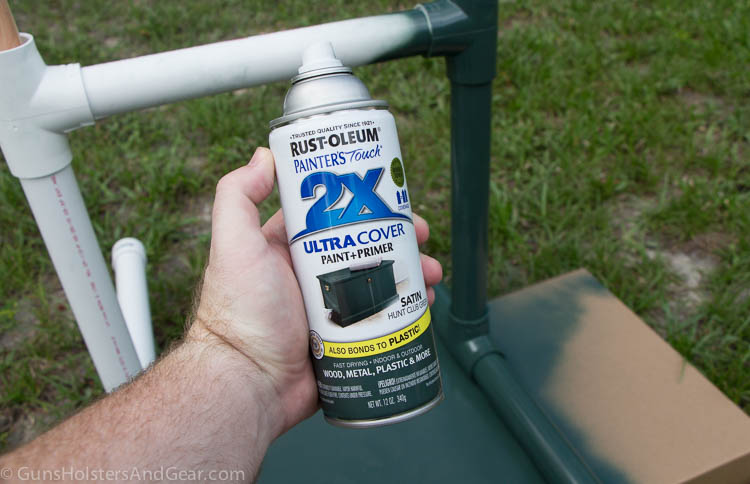
I used Rust-Oleum Painter’s Touch 2x Ultra Cover that includes a primer and paint on my stand. I did not sand the PVC, and the paint held good on the pipe plus completely covered all of the printing. I paid $3.87 for a single can of the paint. There was more than enough in a single can to do a single coat on two target stands.
Cheaper Assembly Option
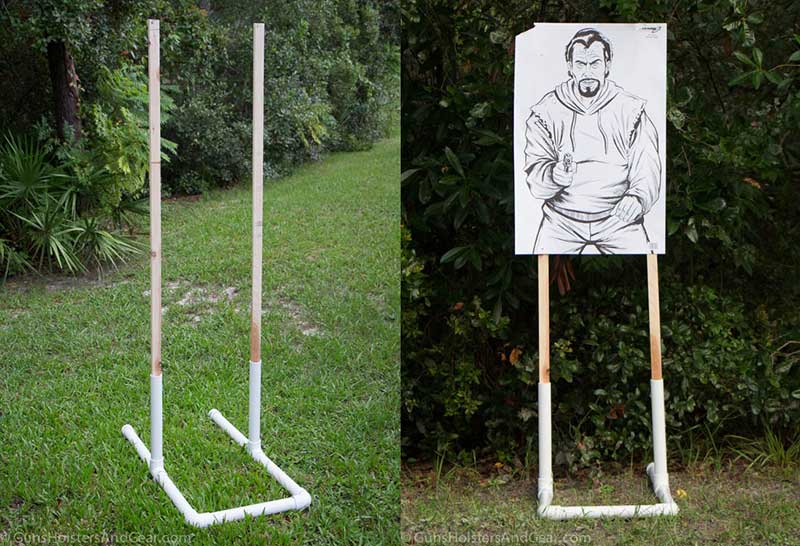
For a less expensive version of this stand, delete two of the tees and the extra 2′ section of PVC. Then when assembling the target stand, do not make a cross bar support for the upright section. This will still be sturdy enough for most people and will save you about $8.11 and bring the parts price down to $26.29. I prefer to have the cross bar support, but it may not be important to you.
Final Thoughts
I hope this has been helpful to you. There are a lot of different ways you can make a home made target stand, and using PVC like I have done is just one of them.
If you have any thoughts on how I can improve these plans, please let me know in the comments section below. I want to make sure that every shooter has a chance to have a quality stand without breaking the bank on parts or losing their mind on convoluted instructions.
Disclosure
GunsHolstersAndGear.com is an independent, for-profit website. I do not charge readers a dime to access the information I provide.
Some of the links on this page and site are affiliate links to companies like Amazon and Palmetto State Armory. These links take you to the products mentioned in the article. Should you decide to purchase something from one of those companies, I make a small commission.
The links do not change your purchase price. I do not get to see what any individual purchases.
71 replies on “How to Build a PVC Target Stand”
I built a few of t
hese in the past that were pretty similar but I like your design better so I’m gonna build my own using your design. Thank you and very nice job
Thanks for the feedback – I’m glad it is helpful.
Did you have any issue with the compete unit getting blown over in heavy winds? With mine when on dirt or grass I found metal U hooks that I installed,over the bottom box tubes and into the ground to hold the units very solid and wind resistence
I haven’t had any problems with it tipping in the wind. I could see that as a problem without some sort of weight packed into the base, though. I imagine with a high enough wind, it would still tip over and U hooks would definitely help.
Thanks for the instructions. It was easy to follow and build. I think I bought the wrong plugs, though…hahaha. I was still able to fill the base with gravel that they use for cement mix. Thanks again!
I’m glad it helped out. I really enjoy the use of mine.
Just wanted to say these were excellent instructions. I am by no means a handiman but these were simple enough even for me to follow. The range close to me is only $50 for the whole year but it requires you to bring your own stand. I was paying about $20 each time to go to an indoor range. Having this target stand is going to save me a LOT of money. Not to mention I won’t be rushed for time at the range! Many thanks to you for putting these together!!!!
Hi Jeff,
Thanks for the feedback. I’m really glad this helped you out.
Richard
These are amazing, thanks for the guide. Making 15 of them for target practice for my boys, spent $160SGD. About $10SGD each!
I’m glad they worked out for you. I use mine regularly.
-Richard
I just built two of these, they’ll be awesome to use!
Thanks for the feedback Neil. I hope you get lots of time shooting with them!
-Richard
This is great! Will make a couple of these for my 2 upcoming desert shooting trips. Thx for the details!
Glad it is helpful!
-Richard
I cut the front and top cross pieces 24″ which is the width of my man shaped targets.
https://uploads.disquscdn.com/images/c55cf1ca6f40fed2c371834e16fb51adb3db428558312bf3ac1fa89673432be1.jpg
Wow – what a beautiful place to shoot!
-Richard
My first DIY shooting project. So of course I screwed it up as far as the caps go. I didn’t understand the difference in caps. But I did find a use for them:
When I filled the two ends with desert gravel, I used the two remaining caps to keep the contents ‘inside’ while transporting. I picked two rocks that would fit the inside to keep the smaller stuff inside when the end caps come off to be inserted in the back of the base. That way I don’t have loose gravel everywhere when I break them down to transport back home. Easy enough and it looks great! BTW I bought everything in black PVC so I wouldn’t have to paint. Took 5mins. https://uploads.disquscdn.com/images/3a94ba98b9ce5bc75101d895424f6451d705f9d5abdc1487621de2e30aa84bd7.jpg
Looks great! Good call on the black PVC.
-Richard
Going to build a pair for myself soon…but I’m curious why all the versions of this I see only includes a cross piece on the front of the base, and not the back. I’d think you’d want that for stability when carrying and transporting. Thoughts?
It should be easy enough to add a cross piece in the back. For me, I don’t find this design to be unstable, but I am also not transporting it on a frequent basis. I can see how adding another section would further improve its durability for regular transport.
-Richard
We made some similar targets last year. They have worked fairly well, but we have a lot of winds in our area. I like the idea of filling the base with gravel (or decomposed granite which we have lots of!) Thanks for a well described stand. Have you thought of attaching chicken wire to the furring strips so that a target could be clipped to the chicken wire? Might cut down on the amount of cardboard necessary for a shooting trip.
Another fun target stand is made from a dead push mower. Scrap the motor, bolt/screw a piece of 4×4 post to the deck, screw or nail 2×4 s to the square, for uprights. Not perfect but cheap and mobile.
You can put. 20lb sand bag on it for ballast
Hey, Richard. Thanks for posting this! I was looking for a target stand that’s cheap, and breaks down flat for transport, and these are _perfect_. I picked up the parts yesterday, and plan to build mine today. And maybe a couple more for my nephew and brother-in-law. I can’t wait to take this out in the field and do some shooting!
Hi Chris,
I’m glad this information was helpful to you. I’ve gotten a lot of good use out of mine.
Best,
Richard
Ran across this today in an effort to build my 8yr old a target to shoot his pellet gun at. Easy to follow with a good list of
materials. Thank you for taking the time to document this and post it. It looks to have served many people over a few years.
To contribute to your post, here is a list of materials from Lowes with Item #s. If someone was inclined to they could order online for store pickup to make that step a bit easier.
Lowes Item # Description *Unit Price QTY Total
23830 Charlotte Pipe 1-1/2-in x 10-ft 330-PSI Sch 40 PVC Pipe $5.97 1 $5.97
256098 Charlotte Pipe 1-1/2-in x 2-ft 330 Schedule 40 PVC Pipe $4.17 1 $4.17
23405 Charlotte Pipe 1-1/2-in dia PVC Test Cap Fitting $0.96 4 $3.84
23907 LASCO 1-1/2-in Dia PVC Sch 40 Tee $2.23 4 $8.92
23909 LASCO 1-1/2-in Dia 90-Degree PVC Sch 40 Slip Elbow $1.38 2 $2.76
23899 LASCO 1-1/2-in Dia PVC Sch 40 Cap $0.98 2 $1.96
4511 Furring Strip (Common: 1-in x 2-in x 8-ft) $1.05 2 $2.10
150887 Oatey 8-fl oz Pvc Cement and Primer $8.75 1 $8.75
$38.47
Looking forward to using the stand for years to come. Thank you again.
Thanks for taking the time to list the parts like that. I’m betting that will help some folks!
-Richard
Ran across this today in an effort to build my 8yr old a target to shoot his pellet gun at. Easy to follow with a good list of materials. Thank you for taking the time to document this and post it. It looks to have served many people over a few years. To contribute to your post, here is a list of materials from Lowes with Item #s. If someone was inclined to they could order online for store pickup to make that step a bit easier. Looking forward to using the stand for years to come. Thank you again.
Lowes Item # Description *Unit Price QTY Total
23830 Charlotte Pipe 1-1/2-in x 10-ft 330-PSI Sch 40 PVC Pipe $5.97 1 $5.97
256098 Charlotte Pipe 1-1/2-in x 2-ft 330 Schedule 40 PVC Pipe $4.17 1 $4.17
23405 Charlotte Pipe 1-1/2-in dia PVC Test Cap Fitting $0.96 4 $3.84
23907 LASCO 1-1/2-in Dia PVC Sch 40 Tee $2.23 4 $8.92
23909 LASCO 1-1/2-in Dia 90-Degree PVC Sch 40 Slip Elbow $1.38 2 $2.76
23899 LASCO 1-1/2-in Dia PVC Sch 40 Cap $0.98 2 $1.96
4511 Furring Strip (Common: 1-in x 2-in x 8-ft) $1.05 2 $2.10
150887 Oatey 8-fl oz Pvc Cement and Primer $8.75 1 $8.75
$38.47
*The unit prices listed here are what my local Lowe’s store were selling the items at on this day, prices may vary in your location
This has been great. Built my first one last week and tested it out. Its great. On my way to the hardware store to get whats needed to build another one.
Only thing I did different, and because I live in an apartment, is I got some extra test caps and filled in each side of all the pipes I put sand in. This way I could take the stand more apart making it better for me in storage and going back and forth to the range.
This way it all packs up nicely in a (not so large) duffle bag for storage and travel (besides the wood sticks of course).
I really appreciate the post & information on building this. I also wanted to say an extra thanks for making the list in a downloadable/printable PDF. I know its small but it makes a difference and is much appreciated.
I’m glad the article (and the printable list) was helpful. Good idea about making it so you can break it down further for more compact storage. Thanks for reading!
-Richard
Has anyone successfully, or unsuccessfully, tried this to mount swinging steel plates?
Hi Ted,
I was hoping that someone would chime in, but it looks like no one has. Although I have not tried to use steel plates with this, I would think that it would be doable with small plates that fit within the uprights. You might need some additional height to make room for any chain hanging down.
You could also go wider to accommodate a larger plate. However, I wouldn’t add more than a foot total to the width due to concerns about the weight of steel vs. the strength of PVC.
If you try it out, would you let us know how it turns out?
-Richard
I’ve made several of these over the years and I thought about doing that on a new build and possibly threading a bolt thru another cross member section of PVC up higher, but I think that would be tough given the weight balance. Most of mine have been made with sand in the base, but I’ve jumped to pea gravel or TB/Traffic bond I had on hand in the base of late. I drill a few small holes on the underside of the base support for water to drain that has crept in thru the uprights and worked its way down into the base. I had some cracked PVC from water freezing and busting one of my base pieces of pipe a year ago because I glue mine fully and I use a full rectangle base of 4 elbows around the bottom at the corners. My guess is a stronger (say, 3″) PVC that was fully glued together from top to bottom, wouldn’t have an issue supporting a single or tandem plate set-up. Maybe I’ll do that. Shame there’s no way to post pics. Good luck all.
Thank you for the information.
You are welcome. I’m happy you found it useful
-Richard
So does this list make one or two targets?
Thanks for sharing, I will make one now for sure, I am also looking for plans/ideas to build a swinger target. Has anyone made one and can share the plans?
Thanks
I made a couple of these stands and every time I have taken them to the range I’ve had several people stop me to ask questions about the them, they are are a big hit with everyone that sees them so I now keep the link to your site on my phone to share with people your site so they can make their own.
The only variation I made on mine was how I weighted the bases, I didn’t have anything suitable on hand so I picked up a 50lb bag of “play sand†which ran me about $5 at Lowes.
On one stand I filled the two back base tubes and the entire front of the base that forms the “U†on the front side of the stand, doing this made the stand VERY stable and is much better suited for windy areas, but it makes the stand heavy, if you have a shooting area that is pretty well sheltered from the wind you can use less sand like I did on the second stand, a 50lb bag of sand will yield about 6-8 stands.
On the second stand I again filled the two back base tubes but just the very front base tube that attaches the front left and right side of the base, again the stand is VERY stable and it has yet to tip over, even on a moderately windy day, this stand weighs about half as much as the first one and I believe a 50lb bag of sand will yield you about 8-10 stands.
A friend of mine made a few stands and made one with a complete “square†base by adding another tube to the rear of the base and he made another one without the very front base tube so the base looks like an “Hâ€, they both have worked very well, we both also opted to retain the cross bar on the uprights.
Thank you for hosting the instructions, parts list and images on your site, I’ve been wanting to get my own target stands for a long time and this page convinced me to make my own, I chose to make my “upright†tubes a bit shorter to help prevent them getting damaged by an errant shot, but even if that should happen, a repair will be extremely easy.
Thanks again and happy shooting.
Hi Clinton,
Thanks for your feedback and variation suggestions! I’m glad they are working out well for you. I know I love mine.
-Richard
Great basic plan! I’m going to make mine with no gluing on the uprights so that take-down/ set-up/transport are easier. This will also make replacement of upright parts easier (errant shots by newbies!). So, my base will be solidly glued together with ballast completely sealed and the upright frame and furrys will be separate from the base as well as each other. Easy-peasy transport, set-up, and take-down with less weight per carry load.
Oh, I read this through 3 times to be sure…you don’t reference dry fitting or marking alignments on both pieces to be glued together. As a retired construction worker and fantabulous great-grandmother who builds pvc tents, teepees, bat houses and other “cool s**t” with little people, I can attest that “measure twice, cut once” & dry-fitting are critical steps with pvc. Mark your 2 pieces so that you can quickly align them for joining. You definitely want your T-joints at 90° angles and once you put the clear “glue” on you have mere seconds to align the pieces before the chemical reaction sets up!
Happy shooting!
Hi MaryAnne,
Great comments – thanks for sharing. I definitely agree with measure twice & cut once and with dry fitting. I certainly encourage people to do so.
-Richard
Made mine so they are takedown for transport. 4 stands fit in an extra double rifle case I had otherwise taking up space. Also made the pieces 20†instead of 18â€. Thanks for the idea!
I did the same thing Billybob….a little wider fits my 24″ backers better. with the cross pieces 20 1/4″ the outsides of my 2x is right at 24″.
Should you really be shooting in a strong wind ??
For those that have concerns about weighting the stand down without using sand or gravel, you can pin it with tent stakes. Just drill a hole through the pipe in front of the two upright pieces then use a tent stake to pin it to the ground. We made these for our county shooting sports team to use . The tent stakes work great.
Good idea – thanks for sharing!
-Richard
Yes…in a safe controlled environment, definitely. If I’m spending a decent portion of my vacation and $2000 on an elk hunt out West where it is windy about 90% of the time, I’d want to be prepared and acclimated to shooting in a windy condition. On top of that, a 25 mph wind will typically move a 140 grain bullet maybe 1-1/2 to 3 inches at 100 yards, depending on the powder load and bullet type. Most people building and using these are likely using them for pistol ranges at 5 to 20 yards away, which would make the wind barely a factor at those ranges. Like they say, “Common sense is so rare these days, it ought to be considered a super power.”
It is a good plan and the stand works well, including the ability to replace parts when needed. I chose not to load the pipe with an ballast material as I don’t think the stand will stand up to even a moderate wind with a giant cardboard sail attached. So, I am committed to adding three sandbags to the mix and carry them with the stand to the range. The sandbags are going to be necessary anyhow so I use them and they pin the frame down firmly. I am a retired police officer and one of our range officers a few years back to decided to make a version of these stands for convenience at semi annual department wide qualifications. Sadly theY took a terrible beating during the course of the day but he anticipated that and had spare PVC parts to keep the range moving. Every year the midnight shift outshot everyone, followed b y 4-12 and the daytime chairborne rangers could not hit anything. The female radio operators out shot them and they don’t even carry. This is a good idea and I hope others use these and shoot often., Punching holes in paper is not that hard but when rounds are coming back at you skills go to hell, unless you practice. HAPPY SHOOTING!
I modified your measurements to 15†pieces which only requires the single 10’ section and it turned out great. Can’t wait to get out and start using it.
Thanks a lot for publishing this. I got the material for two stands a couple of years ago, but didn’t get around to building them until today. They were a snap to build, and I can’t wait to get out to my sister-in-law’s farm to try them out. Nice design.
Hi Chris,
I’m glad this was useful for you. I’ve gotten a lot of use out of mine.
-Richard
I just finished building your target stand. It was so easy to do – especially for a girl! 🙂 My only question is where to find targets big enough to fit the span of the strips. Or do you make your own? I put up a large piece of card stock and attached my targets to that using binder clips (at the top) and scotch tape on the bottom. This works well but would be cumbersome to do in the field. Do you have a source for large paper targets?
Thanks
Hi Polly,
Thanks for your feedback! I’m glad the instructions were helpful.
I usually use large targets like those used for law enforcement qualifications. But you can use cardboard from old boxes to make a backer and use smaller targets if you like. If you already have a lot of smaller targets, that is probably the best way to go. It’s not elegant, but it gets the job done.
Action Targets is one of the largest target makers and they have a wide range of full-size targets here: https://shop.actiontarget.com/prodcat/papercardboard.asp Action offers a wide range of target choices including photorealistic ones. These should all fit the target stand easily. Just bring a sample gun and attach them directly to the wood strips.
However, Action targets can actually be purchased cheaper from third party vendors. I purchase from Optics Planet here: http://shrsl.com/2aasw
For transparency, that is an affiliate link where I earn a small commission if you buy anything after using it. However, I don’t recommend companies that I don’t do business with already. Optics Planet offers a much better price than Action and I’ve always gotten good service from them.
I hope this helps!
Richard
Polly – if you have a building supply store like Lowe’s or Home Depot near you, they carry several types of plywood or formed panel products. All of which will eventually break down in the elements outside, but you can get several shooting sessions rounds, maybe dozens, out of anything from 1/4″ plywood, hardboard, or OSB sheathing. Most of these places will cut them down to your sizing for free, and they often have reduced pricing pieces that have been damaged in transit or handling that you can get rather cheap. Just attach to the 1×2’s with a few 3/4″-1″ wood screws. Keep in mind, this makes the unit top heavy, so added weight at the bottom or in the pipe base is a plus.
Thanks so much for making these plans available. I made mine this morning and as some others have done, I made mine 24″ across. I did this because the range I often shoot at uses 24″ foam board as backers for the targets so I usually cut up pieces of cardboard to that dimension so I can just clamp the cardboard to their backers. Now I just need one size for the range or my home target stand.
Thank you very much for this. I built one based off your design. Used it today and realized I left my cardboard at the house. Stapled an old T-shirt to the furring strips and used a couple of bobbypins to pin the targets to the shirt. I discovered that this allowed me to just put the wood together for next time. Pulling the upper parts out, the whole thing stores well on the wall in the garage flat meaning that its a simple setup and is quite portable. Thanks again
good pvc target stand design im thinking that since most cardboard targets are 18″ wide maybe add one 18 inch section on the base width what is the best way to secure the targets to the wood strips?
Hi Jeffrey,
I use a staple gun to attach targets to the wood strips. I hope that helps!
Richard
Thank you for the guide and info! Building mine today. Unfortunately, it would seem the cost of pvc has nearly doubled since this guide was written! $65 total for me.
Hi Jacob,
Construction materials are through the roof right now. In my area, 3/4″ plywood is nearly $80/sheet. I appreciate your cost update on the parts in this build!
Richard
I just made these but a bit bigger. My backers are 24X36 and using Refactortactical.com Essentials Shooting Targets which are 23X35. So I made mine so the straps were 24 inches apart, my uprights are 24 inches a so are my legs running front and back
Great write up. Two suggestions: 1) The test caps size should say for “inside diameter”. 2) When installing, put cap on cement floor with some solvent facing up then place pipe end on top with well lubricated solvent inside and press down while twisting back and forth. JMHO
Well prices have changed, I just picked up my materials at Home Depot
$49 bucks
I just made one and prices are up $54 Home Depot, And I didn’t glue mine because I can disassemble it and put it in my small car Also a good reason for not gluing it is in case, you’re a bad aim and shoot the stand now you can replace broken pieces because you didn’t glue it, and yes, I’ve used it and its sturdy without the glue.
Thank you
Wonderful plans–clear and easy to understand! Thanks for sharing.
I cut the cross members (all my segments were 2’ long instead of your plans which called for 16” long) in half. I then added a 2’ long 2” piece of pvc at the cross members. This piece fits over the 1 1/2” pieces, and allows the legs of the stand to go from 2’ to 3’ wide for smaller or larger target widths.
Just built it this morning hope to shoot a few rounds when I get back home.
thanks easy to follow. 6/21/2023 material cost about double at my local home depot 🙁
This is a great tutorial. I built something almost exactly like this a few years ago, but the second model without the crossbar. Instead of the cross bar, when setting up I staple a few flattened beer cases across the furring strips, and then staple or tape my targets to the beer cases. It’s just sturdy enough that the PVC crossbar isn’t necessary. Also, I didn’t fill my base with anything heavy. Instead, I just have a few landscaping staples I’ll put on each end if it is windy. Has worked well so far. I can disassemble and throw the whole thing in an old lawn chair bag.
Great target stand, easy to build with your plans. FYI the price for the parts list for two stands was 117.00, about 60% increase from when you put this together. Inflation.
Thanks
Have not built mine yet, but here is my variation for others to consider. 1) Don’t use ballast of any kind. Instead drill through holes in the ends and use tent stakes or something similar to anchor assuming the stand will be on soft ground. It saves weight and increases portability. 2) To modify the author’s “cheaper” design, I would instead make the base into an “H”. This would require an additional pair of tee connectors to form the horizontal of the “H” in contact with the ground. This has the added benefit of eliminating the two elbows and the connecting piece. This tee can be placed just slightly forward or aft of the tee connector used to make the uprights. Balance won’t really be an issue since the tent stakes should be sufficient as anchors. I personally would still incorporate the tee connectors and horizontal of the “H” between the two uprights where the furring strips are attached for stability. 3) Finally don’t glue anything as it’s really unnecessary. The pieces are really tight dry fitted and not glueing eases portability. The added benefit of not glueing is one can modify, on the fly, the spacing of the base and the uprights by simply using longer or shorter length of the horizontal “H” to suit their need based on target size. And since tent stakes are being used and no glueing, the length of the vertical part of the “H” in contact with the ground can be as short or long as needed by the user. Finally if anyone has an issue of the pieces coming apart during use, a simple solution would be drill through holes into the connections (instead of glueing) and simply use the appropriate size clevis pin easily purchased at your local hardware store.